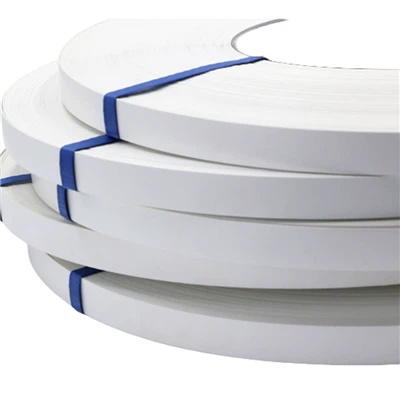

Applying birch veneer edging on curved surfaces can be a challenging yet rewarding task. As a supplier of high - quality birch veneer edging, I've witnessed the beauty and functionality it brings to various projects. In this blog, I'll share some valuable insights and practical steps on how to apply birch veneer edging on curved surfaces effectively.
Understanding Birch Veneer Edging
Birch veneer edging is a thin layer of birch wood that is used to cover the exposed edges of furniture, cabinets, or other wooden structures. It not only enhances the aesthetic appeal but also provides protection to the edges. Birch is known for its light color, fine grain, and durability, making it a popular choice for many woodworking projects.
Tools and Materials Needed
Before you start the application process, gather the following tools and materials:
- Birch Veneer Edging: Ensure you have the right width and thickness of birch veneer edging for your project.
- Adhesive: Choose a high - quality adhesive suitable for veneer application. Contact cement or hot melt glue are common choices.
- Scissors or a Utility Knife: To cut the veneer edging to the appropriate length.
- Roller: A soft - faced roller is used to press the veneer edging onto the surface.
- Sandpaper: For smoothing the edges after the application.
- Heat Gun (Optional): Can be used to make the veneer more flexible for curved surfaces.
Preparing the Curved Surface
The first step is to prepare the curved surface where the birch veneer edging will be applied.
- Clean the Surface: Remove any dust, dirt, or debris from the surface. A clean surface ensures better adhesion.
- Smooth the Edges: Use sandpaper to smooth the edges of the curved surface. This helps the veneer edging to fit more snugly.
- Measure the Curve: Use a flexible measuring tape to measure the length and width of the curved surface. This will help you cut the veneer edging to the right size.
Cutting the Birch Veneer Edging
Once you have measured the curved surface, it's time to cut the birch veneer edging.
- Use Sharp Tools: Use sharp scissors or a utility knife to cut the veneer edging. A clean cut ensures a better fit.
- Cut with a Margin: Cut the veneer edging slightly longer than the measured length. This extra margin allows for any adjustments during the application process.
Applying the Adhesive
There are two common methods of applying adhesive for birch veneer edging: contact cement and hot melt glue.
Contact Cement
- Apply the Adhesive: Apply a thin, even layer of contact cement to both the back of the veneer edging and the curved surface.
- Let it Dry: Allow the adhesive to dry for a few minutes until it becomes tacky. This usually takes about 5 - 10 minutes, depending on the type of adhesive and the environmental conditions.
- Align and Press: Carefully align the veneer edging with the curved surface and press it firmly. Use a roller to ensure full contact and to remove any air bubbles.
Hot Melt Glue
- Heat the Glue Gun: Plug in the hot melt glue gun and allow it to heat up.
- Apply the Glue: Apply a thin bead of hot melt glue along the edge of the curved surface.
- Press the Veneer: Immediately press the veneer edging onto the glued surface. Use a roller to smooth out the veneer and ensure good adhesion.
Working with Curved Surfaces
Applying birch veneer edging on curved surfaces requires some special techniques.
- Make Small Cuts: If the curve is very tight, make small cuts along the back of the veneer edging at regular intervals. This allows the veneer to bend more easily without cracking.
- Use a Heat Gun: If the veneer is not flexible enough, use a heat gun to warm it up. This makes the veneer more pliable and easier to conform to the curve.
- Work Slowly: Take your time when applying the veneer edging on curved surfaces. Make small adjustments as you go to ensure a perfect fit.
Finishing Touches
After the veneer edging is applied, there are a few finishing touches to make.
- Trim the Excess: Use a sharp utility knife to trim the excess veneer edging along the edges of the curved surface.
- Sand the Edges: Use fine - grit sandpaper to smooth the edges of the veneer edging. This gives the finished product a professional look.
- Apply a Finish: You can apply a clear finish, such as varnish or lacquer, to protect the veneer edging and enhance its appearance.
Other Veneer Edging Options
In addition to birch veneer edging, we also offer a variety of other edging options. If you're interested in different wood species, check out our Walnut Veneer Edging. For a more cost - effective and durable option, Melamine Board Edge Banding is a great choice. And if you prefer a clean and modern look, White PVC Edge Banding might be the right fit for your project.


Contact for Procurement
If you're interested in purchasing our birch veneer edging or any of our other products, we'd love to hear from you. Our team of experts can provide you with detailed information, samples, and competitive pricing. Whether you're a professional woodworker or a DIY enthusiast, we have the products and knowledge to meet your needs.
References
- Woodworking Magazine. "Advanced Veneering Techniques."
- Furniture Making Handbook. "Edge Banding and Veneer Application."