
In the world of woodworking and furniture manufacturing, real wood edge banding is a popular choice for adding a touch of elegance and durability to various projects. As a trusted real wood edge banding supplier, I've witnessed firsthand the beauty and functionality that real wood edge banding brings to tables, cabinets, and other wooden pieces. However, there are times when you might need to remove real wood edge banding. Whether it's due to damage, a change in design, or a need for repair, knowing how to remove it properly is essential. In this blog, I'll share some effective methods and tips on how to remove real wood edge banding when needed.
Understanding Real Wood Edge Banding
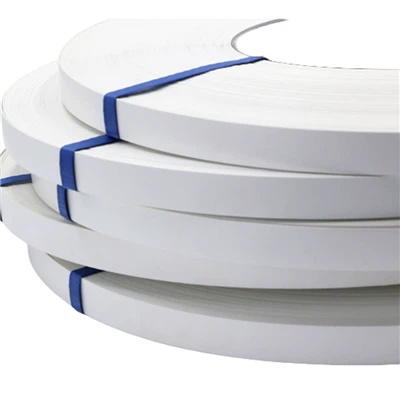
Before we dive into the removal process, it's important to understand what real wood edge banding is. Real wood edge banding is made from actual wood veneers, which are thin slices of wood that are adhered to the edges of a substrate, such as plywood or particleboard. This not only enhances the appearance of the piece but also provides protection against wear and tear. There are different types of real wood edge banding, including Walnut Veneer Edging, which offers a rich, warm color and a beautiful grain pattern.
Reasons for Removing Real Wood Edge Banding
There are several reasons why you might need to remove real wood edge banding. One common reason is damage. If the edge banding has been scratched, chipped, or otherwise damaged, removing it and replacing it with a new piece can restore the appearance of the furniture. Another reason could be a change in design. Perhaps you've decided to update the look of a piece of furniture and want to change the edge banding to match the new style. Additionally, if there are issues with the adhesion of the edge banding, such as it coming loose or peeling, removing it and re - applying it correctly might be necessary.
Tools and Materials Needed
To remove real wood edge banding, you'll need a few tools and materials. Here's a list of what you'll need:
- Heat gun: A heat gun is a crucial tool for softening the adhesive that holds the edge banding in place.
- Putty knife or scraper: This will be used to gently pry the edge banding away from the substrate once the adhesive has been softened.
- Sandpaper: You'll need sandpaper to smooth the surface after the edge banding has been removed.
- Solvent (optional): In some cases, a solvent might be needed to remove any remaining adhesive.
Step - by - Step Removal Process
Step 1: Prepare the Work Area
Before you start removing the edge banding, it's important to prepare the work area. Lay down a protective cloth or newspaper to catch any debris that might fall during the removal process. Make sure the area is well - ventilated, especially if you're using a solvent.
Step 2: Heat the Edge Banding
Using a heat gun, start heating the edge banding. Hold the heat gun about 2 - 3 inches away from the edge banding and move it back and forth along the length of the banding. The heat will soften the adhesive, making it easier to remove the edge banding. Be careful not to overheat the wood, as this can cause damage. You'll know the adhesive is softening when the edge banding starts to become more flexible.
Step 3: Pry the Edge Banding
Once the adhesive has been softened, use a putty knife or scraper to gently pry the edge banding away from the substrate. Start at one end of the edge banding and work your way along the length. Be gentle to avoid damaging the substrate. If the edge banding is stubborn, you can re - heat the area and try again.


Step 4: Remove Remaining Adhesive
After the edge banding has been removed, there will likely be some adhesive left on the substrate. If the adhesive is still soft, you can use a putty knife or scraper to remove as much of it as possible. For any remaining adhesive, you can use a solvent. Apply the solvent to a clean cloth and gently rub the adhesive until it comes off. Make sure to follow the manufacturer's instructions when using the solvent.
Step 5: Sand the Surface
Once the adhesive has been removed, use sandpaper to smooth the surface. Start with a coarse - grit sandpaper to remove any rough spots and then switch to a finer - grit sandpaper for a smooth finish. This will prepare the surface for any new edge banding or other finishing work.
Tips for a Successful Removal
- Take your time: Removing real wood edge banding can be a time - consuming process, but it's important to be patient. Rushing can lead to damage to the substrate or the edge banding.
- Test the heat: Before applying heat to the entire edge banding, test it on a small, inconspicuous area to make sure it doesn't damage the wood.
- Use the right tools: Using the proper tools, such as a heat gun and a putty knife, will make the removal process much easier and more effective.
Alternative Edge Banding Options
If you're looking for different edge banding options, there are several alternatives to real wood edge banding. Metal Edge Banding for Plywood offers a modern and industrial look. It's durable and can add a unique touch to your furniture. Melamine Board Edge Banding is another option. It's available in a wide range of colors and patterns, making it a versatile choice for different design styles.
Conclusion
Removing real wood edge banding can be a challenging but achievable task. By following the steps outlined in this blog and using the right tools and techniques, you can successfully remove the edge banding without damaging the substrate. Whether you're looking to replace the edge banding or make a design change, knowing how to remove it properly is an important skill.
As a real wood edge banding supplier, I'm here to assist you with all your edge banding needs. If you're interested in purchasing real wood edge banding or exploring other edge banding options, feel free to reach out for a consultation. We can discuss your project requirements and help you find the perfect edge banding solution.
References
- Woodworking Magazine: "Edge Banding Basics"
- Furniture Manufacturing Handbook: "Edge Banding Techniques"
- DIY Woodworking Guides: "Removing Edge Banding"